Local development is easier than it first appears.
Hugo
The first step is to decide on and download one of the two Hugo versions that Micro.blog supports: version 0.54 or version 0.91
(I chose 0.91 and had no issues.) Follow Hugo’s documentation to install it on your operating system.
Content to Style
After Hugo is installed on your system, I highly suggest populating it with your own blog’s data. Things make more sense when you are working with familiar data.

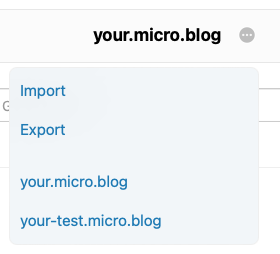
- While logged into Micro.blog, visit your Posts page
- At the top of the page, to the right of your blog’s URL, is an icon of ellipsis within a circle “…”
- Click the icon and, in the popup menu that appears, click Export. You will be taken to an export page where you can download Export theme and Markdown together.
- Copy those downloaded files into the content folder of the local site Hugo created.
Tailwind
Tailwind requires its own setup for local editing. Because Tailwind uses custom CSS that can cause many editors to return false errors, it is apparently not as simple as including a CDN link in your project. (They devote an entire page to editor setup.)
With those three things completed you’re ready to run the Hugo server function, fire up your editor, and start designing your custom theme. ![]() Happy coding!
Happy coding!
Don’t forget:
- Your custom theme requires a free Github account and Git installed on your system. (I personally like using the GitHub Desktop app.)
- You don’t need to upload your entire local Hugo structure to GitHub, just the theme itself.
- This help site has a lot of good answers. The introductory Custom Theme article is a good place to start.
@Nezteb I realize you probably know all or most of the above but I thought I’d add it here in case somebody else has the same questions.